Chapter 10 Using Git from RStudio
Since version control is so useful when developing scripts, RStudio has built-in integration with Git. There are some more obscure Git features that require the use of the command-line, but RStudio has a nice interface for the most common operations.
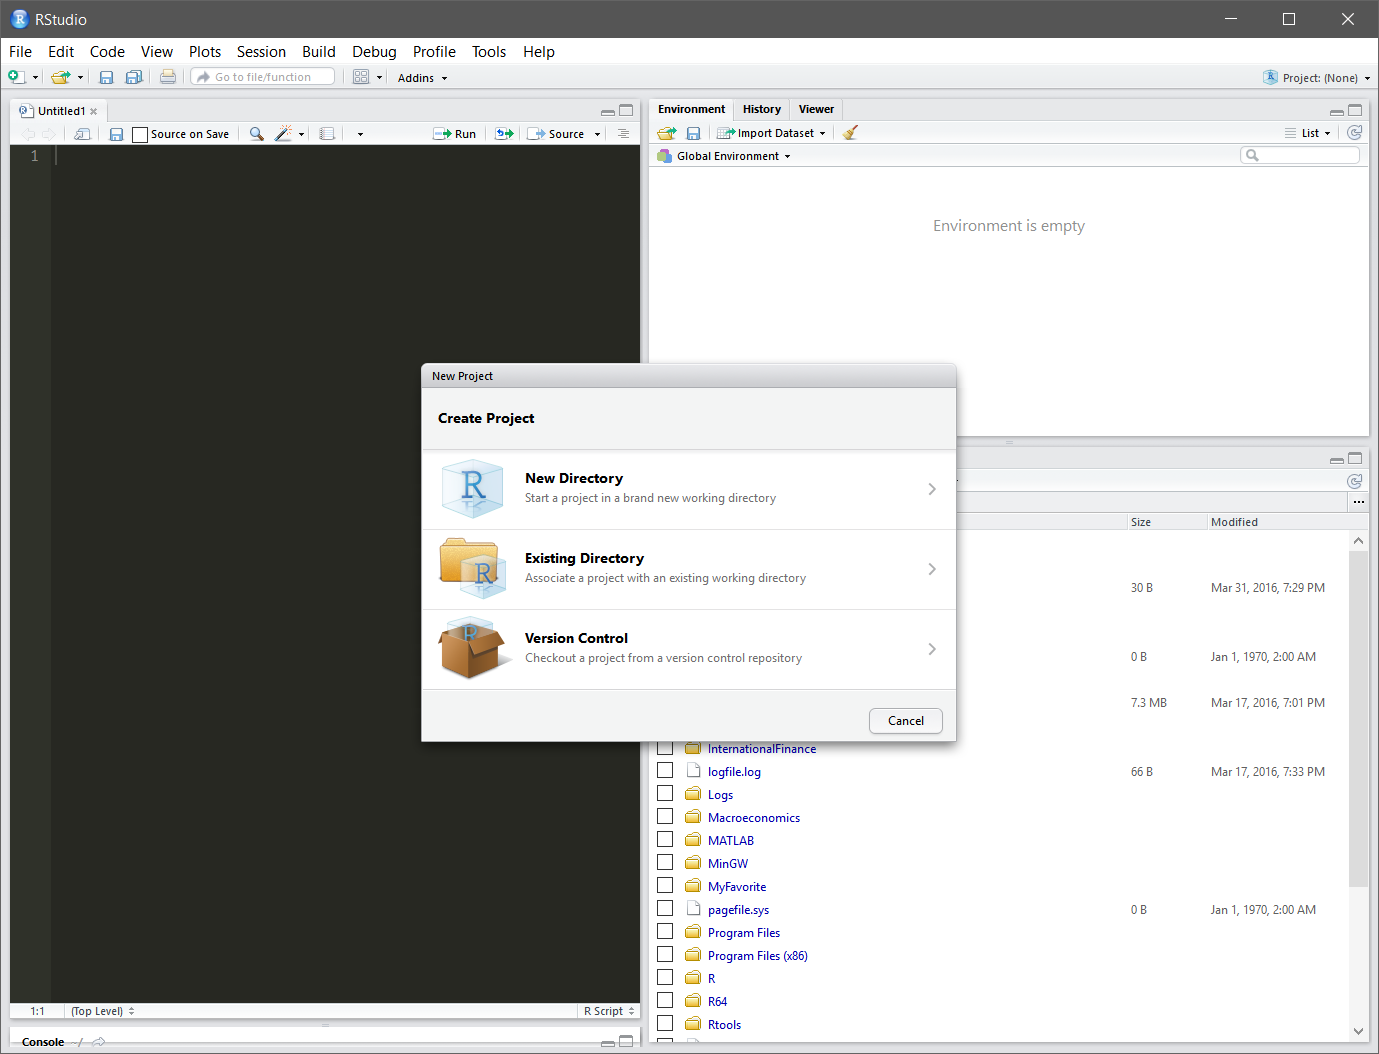
RStudio lets you create a project associated with a given directory that may be integrated with a GitHub account. To get started using RStudio with version control, let’s make a new project by clicking on File > New Project. After doing so a new pop-up window will ask for a few details about the project. As we want to use RStudio with the test_one repository that we have already made, we choose “existing directory” and navigate to the “C:Kotze_one" directory:
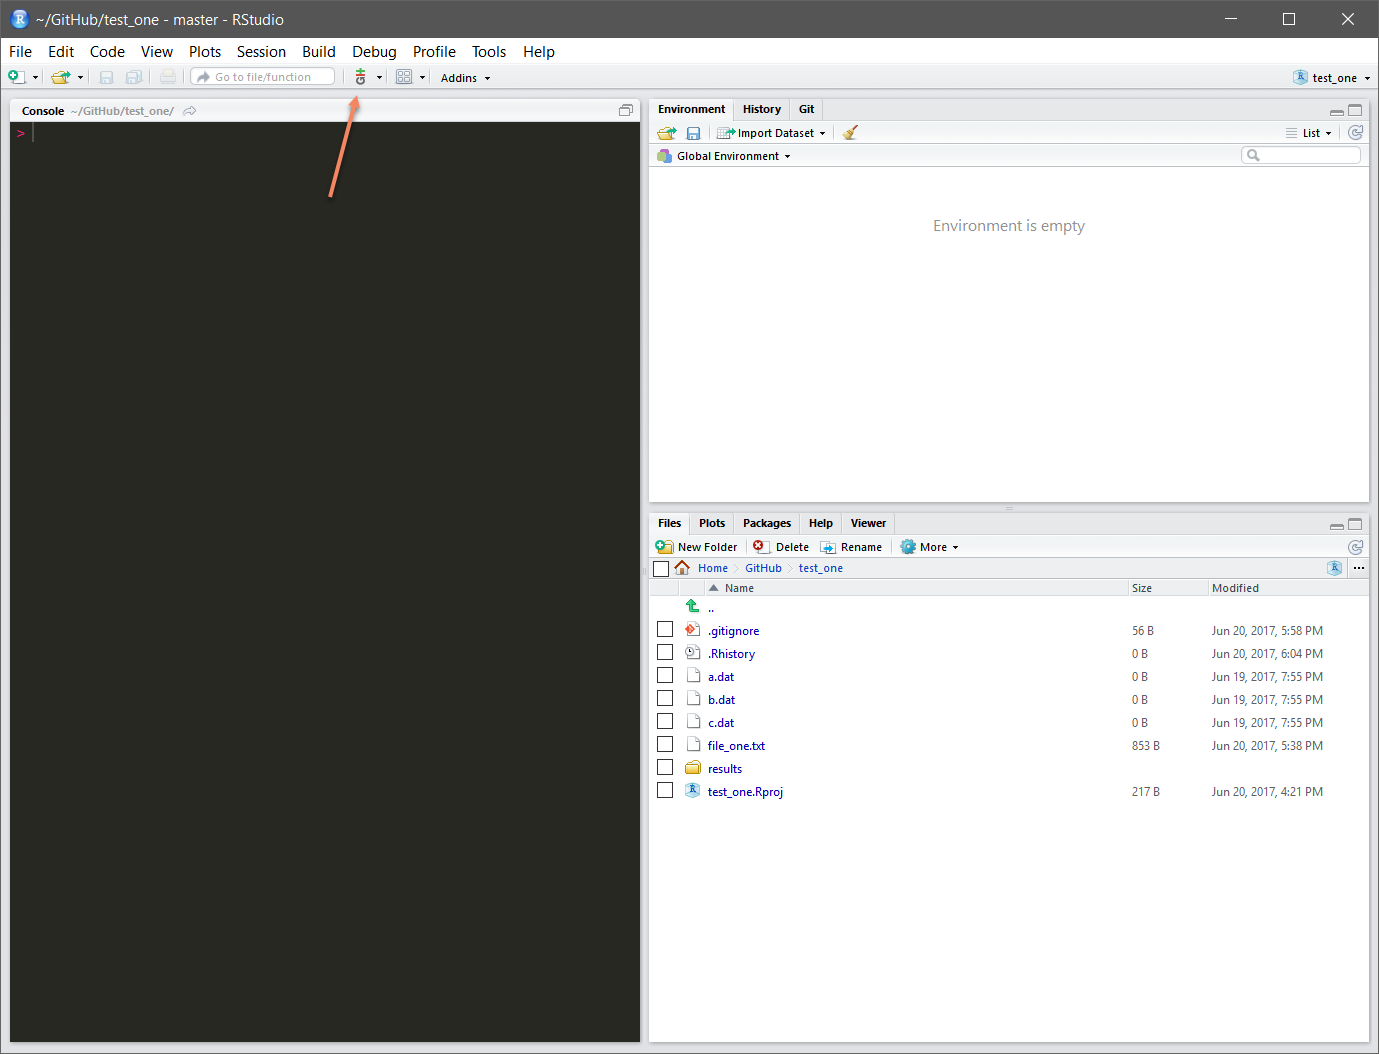
Ta-da! Now you have an R project containing your repository. Notice the vertical “Git” menu that is now on the menu bar. This means RStudio has recognized that this directory is a git repository, so it’s giving you tools to use Git:
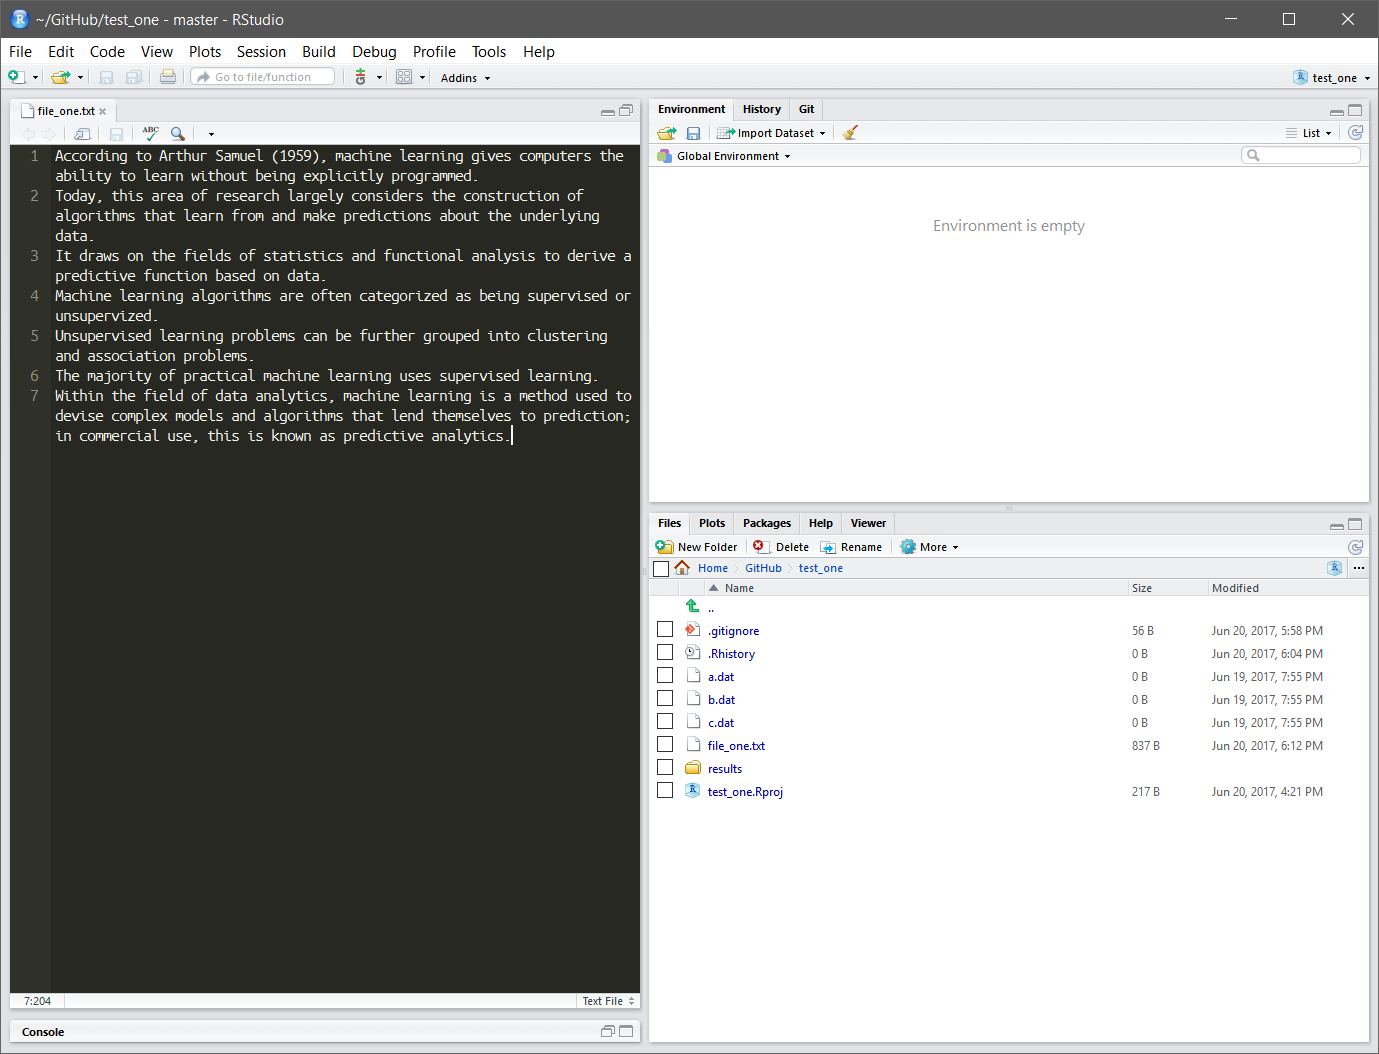
To edit the files in your repository, you can click on them from the panel in the lower right. Let’s add some more information to file_one.txt:
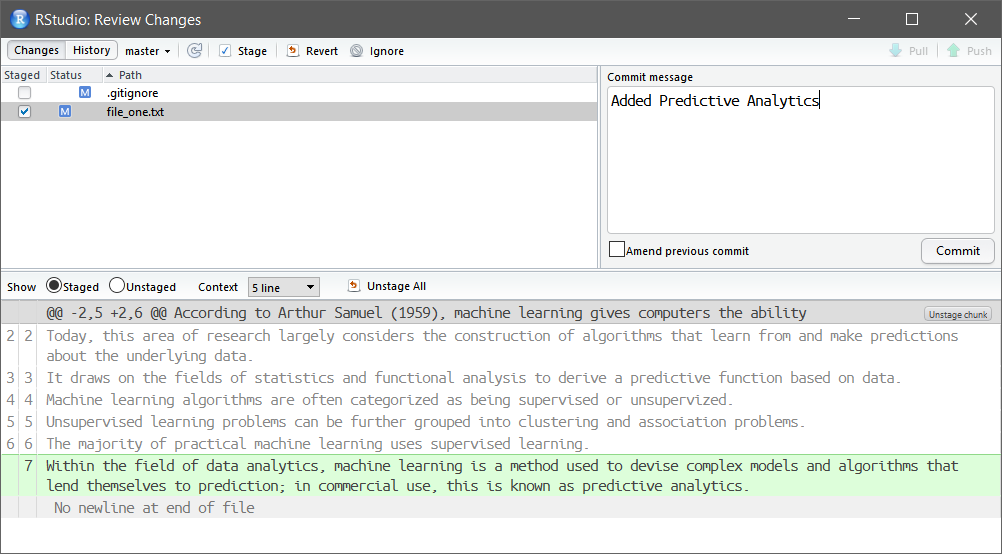
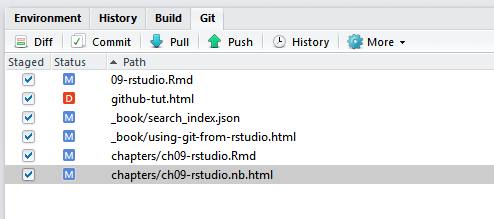
We can also use RStudio to commit these changes. Go to the git menu and click commit. This will bring up a screen where you can select which files to commit (check the boxes in the staged column) and enter a commit message (in the upper right). The icons in the “status” column indicate the current status of each file. You can also see the changes to each file by clicking on its name. Once everything is the way you want it, enter in a Commit message and click commit:
If you then go back to the Git menu you can push these changes by selecting push from the drop-down menu. There are also options there to pull from a remote version of the repository. Note that if the Push/Pull commands are grayed out, it generally means that RStudio doesn’t know the location of any other version of your repository (i.e. the one on GitHub). To fix this, open a terminal to the repository and enter the command:
> git push -u origin master Then restart RStudio.
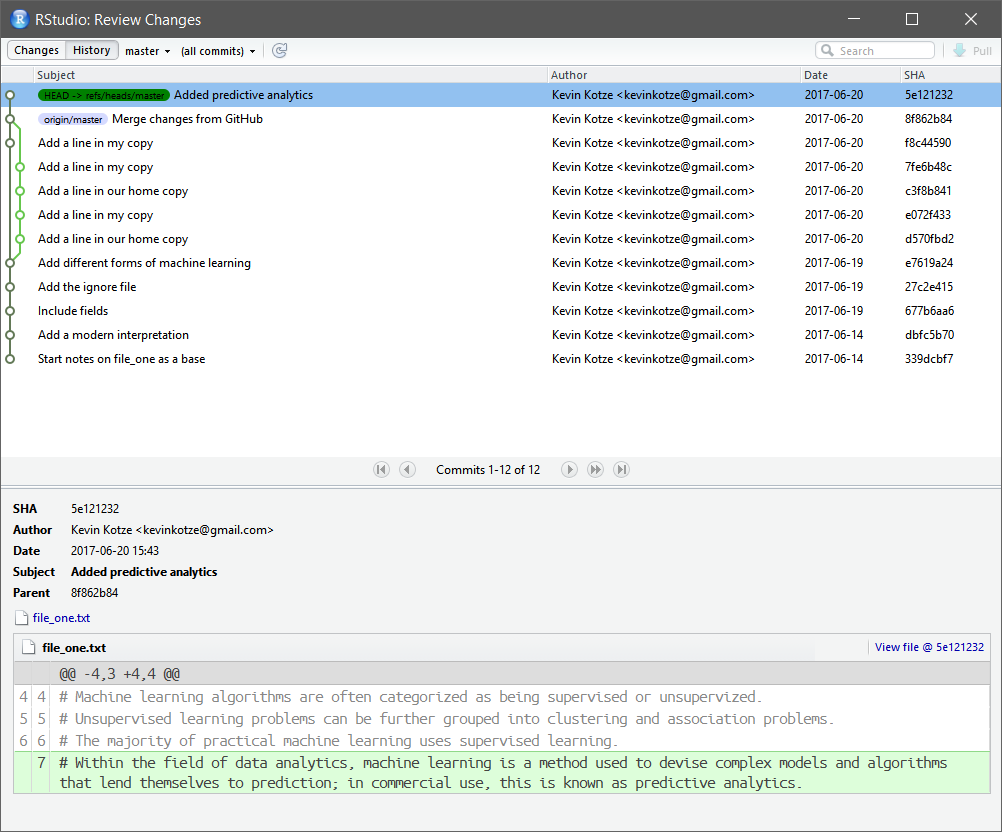
To view the history, you can use the Git menu and click on “history”, which provides a pretty graphical version of what git log would tell us:
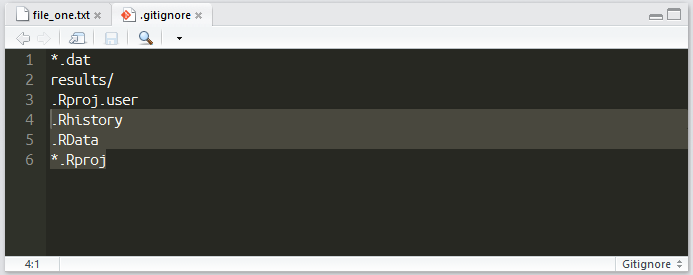
It is worth noting that RStudio creates some files that it uses to keep track of your project. You generally don’t want to track these, so adding them to your .gitignore file is a good idea. In most cases you would want to include .Rhistory, .RData, and *.Rproj to the list of files to be ignored:
Note that in certain cases it may be necessary to refresh the history to reflect recent changes. Then once your changes have been committed to the local repository you can then push them to the online repository, by going to the Git tab and clicking on the Push icon.
10.1 Features of RStudio
There are many more features buried in the RStudio git interface, but these should be enough to get you started!